New Gardening Books
The original idea for this article was an in-depth review of a single book, much like last December’s Planting in a Post-Wild World. But I struggled to pick just one, and finally decided to alert readers to several new books worth exploring this winter. I discovered several of these books among the list of winners of the American Horticultural Society’s Book Awards of 2023. The AHS chooses three winners and several honorable mentions each year, and the summaries and comments by members of the awards committee were my primary source of guidance for this article.
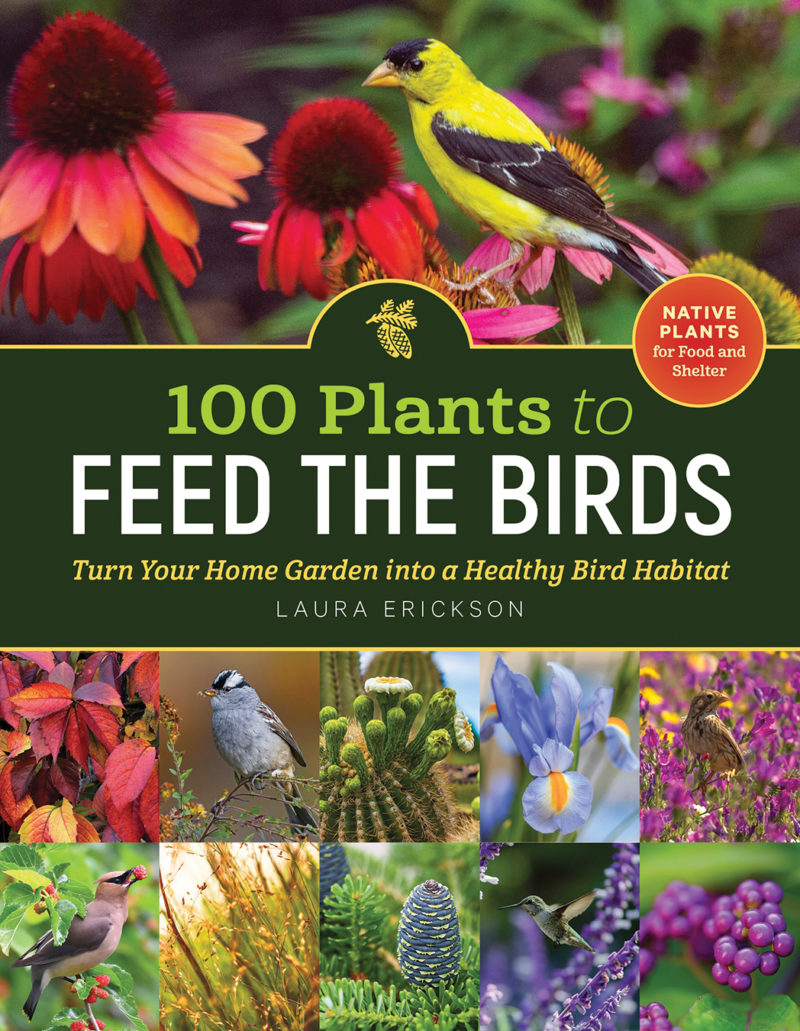
100 Plants to Feed the Birds (Laura Erickson, Storey Publishing 2022)
*** American Horticultural Society Book Award Winner, 2023
Many of us gardeners are bird-lovers, and if you fit that category, you’ll definitely want to consult this book. But it will be useful to all of us who now choose plants with the needs of our ecosystem in mind. The author identifies 100 native shrubs, trees, perennials, annuals, and grasses that provide food, shelter, or nesting materials for birds, and it details what each plant provides as well as the particular birds it benefits and attracts. Also included is basic information about each plant’s required growing conditions and native range.
Laura Erickson is a bird expert. She has received the Roger Tory Peterson award from the American Birding Association, served as science editor at the Cornell Lab of Ornithology, and is an editor of two birding journals, Bird Scope and Birdwatching.
 Bloom: The Secrets of Growing Flowering Houseplants Year-Round by Lisa Steinkopf (Cool Springs Press 2022)
***Honorable Mention, American Horticultural Society Book Awards, 2023
If you have a houseplant that blooms year-round, you know the joy they can bring to a winter day. Who wouldn’t want more of them? It turns out, however, that quite a few year-round bloomers are kind of finicky. But this book shows you the tricks to getting these recalcitrant bloomers to do just that. The author, Lisa Steinkopf is known as “The Houseplant Guru,” and you may be familiar with her blog, thehouseplantguru.com. She is the author of two other books, Houseplants and Grow in the Dark. Here’s what renowned horticulturist Allan Armitage has to say about Bloom:
“I confess! I am far more at home in my outside garden than I am tending plants indoors. From orchids and African violets to amaryllis and kalanchoe, I need help. And now I have it. I have always been a fan of Lisa because she explains what to do in an easy-to-understand style. In this book, she also explains why I should be doing it. The in-depth discussions of photoperiod and types of lights are enlightening, and the plant-by-plant guides are invaluable. I recommend this book for anyone wishing to bring the outdoors in.”
―Allan Armitage, author of Armitage’s Garden Perennials
 Soil: The Story of a Black Mother’s Garden by Camille T. Dungy (Simon & Schuster 2023)
This is not a how-to book; rather, it is a meditative story of one woman’s efforts to transform her manicured yard into a diverse and lively garden. Camille Dungy, who is a poet and professor at Colorado State University, referred to these back-breaking efforts as her “prairie project,” a process that led her to reflect on diversity among humans, as well as a number of today’s most contentious topics. For those of us who think our best thoughts in and amongst plants, Dungy’s ruminations will resonate. As Dungy explained in an NPR interview,
For a politically-engaged person, “a garden can be a balm,” she says. “A garden can be a place of rest and beauty, and a retreat from that persistent, difficult work. But a garden also teaches me patience, and teaches me that … the work of a politically-engaged person often requires true patience. And the garden supports my belief that that patience can very frequently pay off.”
Dungy has also written Guidebook to Relative Strangers: Journeys into Race, Motherhood, and History, a finalist for the National Book Critics Circle Award.
 American Roots: Lessons and Inspiration from the Designers Reimagining our Home Gardens by Nick McCullough, Allison McCullough & Teresa Woodard (Timber Press, 2022)
If you long to visit the home gardens of expert gardeners, this book is for you. The authors visited 20 home gardens across America and reported on each one with lots of photographs as well as tips from the gardeners who created and maintain them.
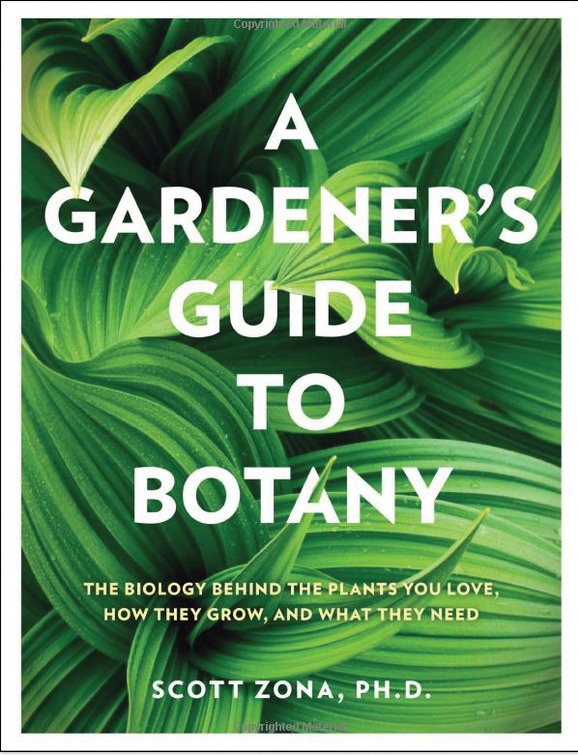
 A Gardener’s Guide to Botany
by Scott Zona (Cool Springs Press, 2022)
***American Horticultural Society Book Award Winner, 2023
Reviewers have hailed this book as helpful to readers at “all levels” of prior botanical knowledge. One reviewer also noted that “a chapter on seed dispersal offered insights into the complex interrelationships of plants and animals.”
American Horticultural Society Book Awards, https://ahsgardening.org/gardening-programs/national-awards/book-awards/
“She ripped up her manicured lawn and challenged the norms of gardening stories,” National Public Radio, https://www.npr.org/2023/05/05/1172727763/garden-gardening-book-writing-soil-dungy (5/5/23)
A Way to Garden Podcast and NPR Radio Show/Books, awaytogarden.com/Margaret Roach/American Roots with Nick McCullough
“Gardening Book Reviews Spring 2023,” Horticulture Magazine, www.hortmag.com
Camille Dungy, Colorado State University/colostate.edu/people
simonandschuster.com/books/Soil/Camille-T-Dungy/9781982195304
Easy to Grow Microgreens

My first harvest! Daikon radish greens served with seared tuna
My first real taste of microgreens— fresh, spicy daikon radish at a local restaurant— inspired me to try growing them at home. This article outlines basic information on microgreens, and gives detailed, step-by-step instructions on how I grew my first harvest.

Salad of cherry tomatoes, sunflower seed and daikon radish greens
Microgreens are full of flavor, color, “tooth” and nutrition. USDA studies have shown that microgreens contain “considerably higher levels of vitamins and carotenoids—about five times greater—than their mature plant counterparts.” Both sprouts and microgreens are extremely nutritious. And, I’ve learned, they’re quite easy to grow indoors. They are especially welcome in the winter months, when there’s less outdoor gardening and more time spent indoors (growing microgreens could be an excellent family project).
There is some inconsistency in microgreen terminology (and even spelling; you’ll see both “Micro greens” and “Microgreens.”) Generally, there are three classes of “immature” greens, listed in order of development time: sprouts, microgreens, and baby greens. Sprouts are grown in water and harvested for root, stem and seed leaf. Microgreens are generally grown in soil (or grow mats). They are harvested for their above-soil stem and leaves (cotyledons and/or very early “true” leaves). Some cultivation methods require artificial light; the method I chose does not. Baby greens take the most time, need full sun or artificial light, and are grown for their developed true leaves. There are pros and cons to each method; as I researched different ways to cultivate indoor greens, I began to hone my “starter” wish list:
- Simple, inexpensive supplies: Since I was new to this, I didn’t want to invest in expensive speciality equipment, shelving, mats, trays, or grow lights.
- Fast and compact cultivation: I hoped to find a method that didn’t require weeks or more of growth, and didn’t take over our indoor living space.
The method that best fit my criteria was to grow greens in “soil” (actually a soil-less medium, see Supply List), in small inexpensive pans, with no need for grow lights. I followed the strategy described by Peter Burke in Year-Round Indoor Salad Gardening. He refers to his harvest as “soil sprouts.” They germinate in the dark for about 4 days, then are moved to the light for 3 or more days. They do NOT require full sun or artificial light like some microgreen cultivation methods.
I was skeptical that Burke’s method would work, but it was a great success, and also lots of fun! As a microgreen neophyte, I followed his expert recommendations carefully. Other gardeners might prefer different cultivation methods (grow mats, hydroponics) or different supplies (fertilizer, growing medium), but this method is how I got started– and hooked on– growing microgreens:

Sunflower greens at 8 days

Red Russian kale greens harvested at 7 days
Supply List:
- 3×6” foil baking pans
- Measuring spoon
- Measuring cup
- Cups for soaking seeds
- 1 gallon plastic bags
- 1 gallon juice container

Extensive root system of mature greens
- Small strainer (I used a fine mesh tea ball, especially helpful for tiny seeds)
- Scissors
- Newspaper
- Watering can
- Seeds: It’s best to use untreated (and organic) sprouting seeds. These are readily available online and in specialty stores. To keep initial costs down, I started with a few 4 ounce seed packets ordered online.
- Soil/Growing medium: Soil-less mixes are highly recommended. I used a commercially available mix that contains sphagnum peat moss (75-85% by volume), perlite, ground limestone, dolomite, and mycorrhizae.
- Organic fertilizer: I used compost and liquid sea kelp.
Step-by-Step Instructions:

1 tsp. small seeds (top), 1 tbsp larger seeds (bottom)

Soak seeds in water 6-24 hours
Soak the seeds: For each 3” x 6” pan, use 1 teaspoon of small seeds or 1 tablespoon of larger seeds (small seeds include broccoli and kohlrabi; larger seeds include daikon radish and sunflower).
Place seeds in cups and cover generously with water. Soak for a minimum of 6 hours and up to a maximum of 24 hours.

Moistened soil/growing medium
Moisten the soil: Mix 1 gallon (3.8 L) of dry growing medium with 3.5 to 4 cups (829 to 947 ml) of water. This can be easily mixed (and stored for future use) in a 1 gallon plastic bag.

Newspaper soaks in water for 10 or more minutes
Soak newspaper in water: Folded, wet newspaper will be the final cover over the soil and seeds. For each pan, use 1 sheet of newspaper, and soak for 10 minutes or more in a bowl of water.

Strained seeds ready to spread on surface of filled pan.
Prepare each grow pan: First place 1/2 teaspoon of liquid kelp and 1 tablespoon of compost in the bottom of each grow pan. Then fill each pan with approx. 1 1/4 cup (296 ml) of the moistened soil. Level the soil by patting gently. There will be about 1/4″ to 1″ of space from soil top to pan edge.

Spread seeds as evenly as possible over top of soil/growing medium
Drain and spread seeds: When seeds are done soaking, rinse and strain through sieve/mesh. For small seeds, I use the fine mesh of a tea ball. Spread the drained seeds over the soil. They can touch but shouldn’t overlap.

Cover the seed bed with pre-soaked wet newspaper
Cover the soil and seeds: After the newspaper has soaked about 10 minutes or more (see Step 3), fold it so it tucks into the pan, and covers/makes contact with the seeds.
Place pan in the dark: Place finished pan in a warm, dark place (I used a storage chest) for about 4 days. The newspaper cover will help provide darkness and moisture for the seeds. As they germinate, the seeds will actually push up the newspaper (see photo below).

Germinating seeds will push up newspaper cover as they grow

Germinated seeds ready to move to light and “green up”
Move pan to the light: On day 5, remove the cover, water the soil (a few tablespoons) and place in a windowsill. The leaves will look pale and yellow, but will “green up” once placed in light. Leave in light for 3 or more days. Water the pan (a few tablespoons) once each day. After about 3-5 days the greens will be ready to harvest (Burke notes that you do NOT need a south-facing window to get adequate light.) Cut the stems above the soil line, rinse, and enjoy! Compost the remaining soil.

Mature greens partially harvested
Final Notes: I loved growing micro greens and plan to continue throughout the year. While I found the 3 x 6″ loaf pans to be a great fit for my windowsills, they do limit the harvest amount. Burke notes that for his larger family, he grows 5 small pans daily. This provides them with an ongoing supply of fresh greens. Larger trays would of course be another option, but they are more cumbersome. Another reason I opted for the smaller trays was to limit possible contamination (such as mold), but this hasn’t happened so far.
Photos: All photos by Meg Norling
Resources:
Bachman, G. Microgreens. 2021. Mississippi State University Extension. https://extension.msstate.edu/southern-gardening/video/2021/microgreens
Burke, P. 2015. Year-Round Indoor Salad Gardening. Chelsea Green Publishing.
DelValle, T. 2017. Microgreens. University of Florida. https://gardeningsolutions.ifas.ufl.edu/plants/edibles/vegetables/microgreens.html
Di Gioia, F. 2020. The ABCs of Microgreens. Penn State Extension. https://extension.psu.edu/the-abcs-of-microgreens
Horney, J. 2022. Grow Microgreens At Home. Purdue University Extension. https://extension.purdue.edu/news/county/allen/2022/02/grow-microgreens-at-home.html
The Edible Garden in December
As the outdoor gardening season winds down, I hope you enjoyed both the gardening and the fruits of your labor this year. If you have cleaned up your beds, planted cover crops or mulched them, and have protected cool weather vegetables that are still yielding, you have earned a break. In any case, now is the time to review this year’s lessons and results while beginning to think about next year.
Reduce Chemicals, Build Soil, Add Diversity
The winter offers time to think about how to improve gardening techniques and be more ecologically responsible next year by:
Reducing chemical use through Integrated Pest Management (IPM). IPM is a process based on observing pest issues, understanding them, taking action only when the damage is significant and using chemicals as a last resort. It requires regular observation and a time commitment. But the environmental damage that is evident from pre-emptive chemical use makes it important. For information about implementing IPM, check out the Garden Shed article Integrated Pest Management.
Build your soil. Healthy soil can reduce the need for chemical pesticides and fertilizers. Insights about productive ways to improve soil naturally come from the Regenerative Agriculture movement. It is a soil focused approach to growing crops that advocates:
- Keeping the soil covered with densely planted crops and employing cover crops or mulching in the off season.
- Minimizing soil disturbance and preserving soil structure by minimizing tilling, adding amendments on or near the surface, relying on soil organisms to carry them deeper.
- Keeping living roots in the soil to reduce erosion, improve structure and add carbon-based nutrients.
- Add diversity by varying and rotating crops, interplanting, and utilizing diverse cover crops.
While these practices are not yet widely followed in commercial agriculture, their use is growing and providing guidance to home gardeners that is ecologically and horticulturally healthy. The Garden Shed article It’s All About the Soil explores it more deeply. The You Tube video Healing the Earth Through Regenerative Farming with Gabe Brown is also a convincing summary of the practice.
- Create a diverse home landscape. Creating a diverse home landscape, of native trees, shrubs, and flowering perennials is essential to reduce the decline in insects and birds in recent decades. It also builds their populations to help manage garden pests naturally. This has worked wonders at limiting cabbage moths and Japanese beetles in my own garden. Get guidance on how to start with a pollinator friendly landscape from the Garden Shed article Plant A Pollinator Paradise. If you need more convincing, watch the video Nature’s Best Hope with Dr. Doug Tallamy, a leader in understanding and repairing native ecology.
Other helpful information, including video material, is available in the references at the end of this article and from the VA Cooperative Extension website.
As the interdependence of all aspects of our environment becomes increasingly clear, our need to integrate key ecological elements follows. Improving our practices in these three areas is a good start.
Other December Tasks
- If your soil isn’t frozen, it is okay to plant garlic and shallots in December. Mulch them well to moderate temperature and moisture.

Winter row cover, cover removed. Photo: B Gardino
- Placing spun fabric row covers over winter hardy vegetables adds several degrees to the temperature under the cover while allowing sunlight and water to reach the plants. For tips on constructing simple hoop style row covers, consult The Garden Shed article: Row Covers: A Season Extender with Benefits.

Leaf mulched herb bed. Photo: R Morini
Put Your Leaves to Good Use:
- Chopping or shredding leaves is a good idea to help speed decomposition while allowing water penetration when used as a mulch.
- Leaves can be used to set up new compost batches, adding winter-generated fruit and vegetable scraps as they become available. When spring temperatures rise into the 50s, the batch’s carbon-to-nitrogen ratio can be fine-tuned to stimulate decomposition. With good moisture and aeration management, you should have compost for use prior to planting summer vegetables. Find guidance for home composting in the article Home Composting: A Guide for Home Gardeners, from the Penn State Extension.
- Leaving your leaves: Leaves left in place provide excellent cover for over-wintering beneficial insects that will help build a natural pest management system in your gardens next year.
Small Fruits

Blueberry bush before and after pruning. Photo: U of MD Extension
- Blueberry bushes can be pruned any time from leaf drop to the start of spring growth. During the first 3 years, remove the low growing canes. After fruit production starts, prune out one of every six of the oldest canes, as close to the ground as possible. For canes aged 1-5 years old, aim for 10-15 canes, 2 or 3 each of the 1-5 year old growth.
- Strawberries should be protected from the cold; 6-8 inches of straw or leaf mulch works well. Plants growing in barrels or pyramids benefit from having the mulch covered with burlap as well.
- Additional detail about caring for these and other small fruits is offered in the publication Small Fruit in the Home Garden from VCE.
Seasonal Tasks
- Drain your hoses. Disconnect them from faucets and lay them out on the ground, both ends open, to let them drain. Then roll them up for winter storage.
- Drain rain barrels and redirect downspouts to ground, rather than refilling the barrels during the cold months.
- Review journal entries and think about improvements for next year in plant selection, location, and techniques.
- Apply your learning when reviewing new catalogs and communication from seed suppliers for next season. It is fun to browse them, looking for new items to grow and assessing different varieties that help avoid disease and insect issues. Pay attention to “time to harvest” and “disease resistance” data. For help interpreting seed catalog and seed pack information, check out Garden Shed article Using Seed Pack Information to Help Your Garden Grow.
- Make a first pass at laying out your crop arrangement for next year. Remember to rotate specific plant families to different parts of the garden, preferably on a 3 to 4 year cycle. The benefits are disease and pest reduction and soil enrichment through plant diversity.
- Care for your tools. Clean, disinfect, sharpen, and generally prepare them for the work ahead. It is also a good time to clean pots and flats if you have a warm enough place to do the wet work. Come spring, you’ll be happy you did it.
Winter gardening

Herbs in Pots Photo: Photo by Carolyn V on Unsplash
- An enjoyable way to keep your hands in the soil during winter is to grow herbs indoors. You need a sunny window, preferably with a southern exposure. Use premium potting soil and add nutrients as recommended. It is best to use clean plastic or glazed containers to reduce watering. Be sure the container has drainage holes and use a non-porous dish to catch excess water. Keep the soil surface moist between planting and germination. Herbs do best with temperatures above 65 degrees, the warmer the better. Basil likes temperatures above 70 degrees, so doesn’t want to be too close to the window during cold weather. Check out Garden Shed article “Be Inspired With Indoor Herb Gardening” for information on growing herbs indoors this winter.
In any case, enjoy your December gardening and happy holidays. Let’s talk again next month at The Garden Shed.
References:
Cover photo: Vegetable Garden in December, R. Morini
Cool Season Planting Chart for Companion, Interplanting and Square Foot Gardening, Washington State University Extension: https://s3.wp.wsu.edu/uploads/sites/2056/2018/10/Cool-Season-Planting-Chart-for-Companion.pdf
Virginia Native Plant Society website:https://vnps.org/
The Ornamental Garden in December
With the onset of winter, leaves have long since fallen and you can easily observe the “bare bones” of the garden. This is the ideal time to walk around your landscape and note what changes or improvements you would like to make next season. And while you’re taking a critical look at your landscape, don’t forget to tackle any gardening chores that remain undone.
- Look for areas in your landscape where water collects after long periods of rain or snow. Water that collects on the surface of the soil during winter will freeze and can damage perennials. As a temporary solution to this drainage problem, dig shallow trenches to help drain excess water away from the planted area. In spring, consider improving drainage by aerating the soil or raising the beds by gradually adding soil as a top dressing. For more information, see this Northern Virginia Soil and Water Conservation district article on solving drainage problems.
- Loosen or remove thick layers of matted leaves from perennial beds that might prevent moisture from penetrating into the soil or, conversely, hold too much moisture in the soil.
- Continue watering recently planted trees and shrubs. This is particularly important because lack of moisture during long, dry periods in fall and winter can cause injury or death to plant root systems.
- Look for cool-weather weeds in garden beds. It may be December, but lots of weeds can be found growing in the garden at this time of year. Common chickweed, henbit, purple deadnettle, and other “winter weeds” sprout in mid to late fall. Weather permitting, pull the weeds now if you can reach them. A little effort now means less weeding needed in spring. As you weed, try to avoid stepping into flower beds because that can compact the soil.
- Check to make sure mulch is not touching tree trunks. If it is, pull the mulch away from the trunk to prevent moisture from being trapped against the bark. Otherwise, the prolonged moist conditions can decay the bark and, in time, eventually damage or kill the tree. For guidance on mulching, see the Virginia Cooperative Extension’s (VCE) publication on mulching.
- Before the first winter storm occurs, check to make sure you have a good supply of sand or sawdust on hand to put on icy walkways near plantings. Some plants are sensitive to de-icing salts, and sand or sawdust are better alternatives to use for this reason.
- After the ground freezes, check for plants that have been displaced due to soil heaving and replant them. This is a common occurrence with plants that were newly planted in fall and haven’t had sufficient time to anchor their roots into the soil. Make sure the roots are well covered with soil and mulch to protect them from freezing temperatures.
- If you didn’t remember to do this earlier in the fall, drain all water hoses and store them in a garage, garden shed, basement, or other suitable place out of the weather. Also, don’t forget to drain irrigation systems and non-frost-proof outdoor faucets.
- Store concrete bird baths, planters, rain gauges and other outdoor ornaments that might collect water and break in freezing temperatures.
- Clean garden tools with steel wool or a stiff wire brush, wipe with a damp cloth, dry, and apply an oil such as cooking oil, boiled linseed oil, tung oil, or WD 40.
PREPARING YOUR LANDSCAPE FOR SNOW
If a heavy snow or ice storm is predicted, take precautions to prevent damage to your evergreen landscape plants. Species with multiple leaders are susceptible to snow and ice damage. The branches of Leyland Cypresses, in particular, are bad about splaying under a heavy snow load and the damage is generally permanent. Other evergreens that might also be damaged include arborvitae, upright junipers, yews, magnolias, boxwoods, and some hollies. Minimize damage by loosely encircling the outside of the plant with jute twine, narrow rope, or strips of cloth so that individual branches can’t catch and hold much snow. Another technique is to tie the main leaders together, high up on the side of the shrub. The bindings may be left in place once the snow melts or until new growth begins in spring.
Clemson Cooperative Extension’s Publication on protecting evergreens from ice and snow damage recommends preventing storm problems in the first place by selecting evergreens with a single trunk or leader. Species with multiple leaders should be pruned to a single trunk or leader when the tree is young.
WINTER HOUSEPLANT CARE
Overwintering plants indoors needn’t be all that challenging. It’s simply a matter of understanding their requirements for water, humidity, temperature, and light. If you ignore these essentials, you’ll find that it’s quite easy to kill a houseplant. Let me count the ways:
- Overwatering (also known euphemistically as “killing with kindness”) – This is perhaps the most effective way to kill a houseplant. Overly saturated soil prevents the plant from taking up oxygen at the root level. Symptoms of overwatering include wilting and yellowing of the foliage. The proper way to water a houseplant is to give it enough water so that it drains from the bottom of the pot. Otherwise, salts in the water may build up in the soil, which will eventually harm the plant. Unless your plant is one that prefers consistently moist soil, like an African violet, allow the soil to dry out somewhat between waterings.
- Lack of humidity – The flip side of overwatering is not having enough moisture in the air. Once we turn the heat on in our homes, the humidity in the air drops to well below 50%, which is the moisture level that most plants need to stay healthy. Browning of the leaf margins or tips generally indicates that the air is too dry. To remedy this problem, place the houseplant in a bathroom or kitchen where steam from showers or from boiling water will raise the humidity level in the room. Or, if you have a humidifier, try to position it near your houseplants. Another solution is to fill a pebble tray with water and set the pots on top of the pebbles so that they are not actually touching the water.
- Exposure to direct heat – Avoid placing houseplants near a vent or other source of direct heat. Hot air blowing on a plant can severely dehydrate it. An overheated plant will appear very limp.
- Exposure to cold air – If your house is not well insulated or sealed against cold drafts, your plant can suffer from exposure to the cold temperatures. You’ll have the same problem if you place a tender tropical plant near a door that is opened frequently.
- Direct contact with a window – Although most houseplants need as much light as possible, don’t let them have direct contact with a frosty window. Otherwise, the foliage touching the glass may freeze.
- Not enough light – Plants that aren’t getting enough light will look pale rather than a healthy green color. New growth will look tall and leggy or spindly and the new leaves may appear smaller than normal. To solve the problem, move the plant to a brighter spot, preferably to a south or west-facing window. Give the plant a quarter turn once a week so that it grows evenly and doesn’t lean or stretch toward the light.
- Pest problems – It may be wintry outside but that doesn’t mean plant pests aren’t an issue. Pests such as white fly, spider mites, aphids, mealy bugs, and scale can multiply very quickly on plants. Inspect your plants frequently for unwanted hitchhikers and deal with them promptly. For more information on houseplant pests, see Clemson Cooperative Extension’s publication on common houseplant insects.
The holiday season is a great time to share rooted cuttings from your houseplants with friends and neighbors. Plants make wonderful “hostess” gifts and are a nice alternative to sugary sweets or scented candles. If your friends are (gasp) not “plant people,” they’ll appreciate your thoughtfulness if you include a few plant care instructions with your gift. As an aside, if you have never propagated a houseplant, then check out the University of Missouri Extension’s article on home propagation of houseplants. It provides straightforward instructions and excellent photos to illustrate the propagation process.
DECORATING FOR THE HOLIDAYS
Celebrating winter holidays in December generally means decorating the house with greenery.
- Cut Christmas Trees – If you plan on selecting a cut Christmas tree, check out Holiday Decorating with Fresh Greenery, which appeared in the December 2015 issue of The Garden Shed. The article includes a table comparing the four most popular Christmas trees – Fraser Fir, White Pine, Scotch Pine, and Norway Spruce. If you’re not sure which is which, here’s how to tell the difference:
Fir – If the branches bear their needles individually rather than in groups and if the needles feel flat to the touch, the tree is most likely a fir.
Pine – If the needles occur on the twigs in groups of two, three, or five, it’s a pine. To further distinguish between white pines and Scotch pines, white pines have longer, softer looking needles than Scotch pines. Scotch pines have dark green needles and stiff branches that can hold heavy ornaments better than white pines.
Spruce – if the needles have four sides and roll easily between your fingers, it’s a spruce.
- Live Christmas trees – If you buy a live Christmas tree with the intention of planting it in your landscape after the holidays, keep it out of doors until you’re ready to decorate it. Make sure it stays well watered and doesn’t dry out. Once you move the tree indoors, keep it in a cool room for a few days only. As soon as possible, move it back outside and continue to keep it well hydrated until it can be planted in a permanent spot in the landscape.
- Poinsettias – These cheery tropical plants are a colorful way to decorate for the holiday season. However, they can rapidly wilt if not properly cared for. To keep poinsettias looking their best, pay attention to their light, water, and room temperature requirements. They prefer bright filtered light, but will also thrive in a sunny, south-facing window. Water regularly but check to make sure the water drains away from the roots. They like evenly moist but not soggy soil. Prolong the display by keeping the indoor temperature at about 68°F during the day and cooler at night.
- Evergreen Wreaths – If you’re planning to use a freshly cut or ready-made evergreen wreath, store it in a cool location until it is ready to be decorated. Soak it in warm water for several hours to keep it moist. Drain it well and then spray it with an anti-desiccant spray to seal in the moisture. After the sealer has set, finish decorating the wreath and hang it, preferably in a shady place that doesn’t receive sun.
- Boxwood Decorations – If you purchase ready-made wreaths, swags, and other decorations that contain boxwood clippings, inspect the clippings for symptoms of boxwood blight (Calonectria pseudonaviculata). Symptoms include leaf spot, leaf drop, browning, or black streaks on stems. Although reputable suppliers of holiday greenery are taking precautions to avoid spreading this disease, it pays to be cautious. After working with boxwood decorations, sterilize garden tools with alcohol or a chlorine bleach solution. Once the holidays are over, bag the decorations for disposal in the trash. Do not compost them. The VCE publication on boxwood blight provides more information on this disease.
- Pets and holiday greenery – Keep pets away from holiday plants such as poinsettias, mistletoe, and holly. Ingesting poinsettia foliage is not normally life threatening to pets, but the sap can cause mouth and stomach irritation as well as vomiting. Also, if the plant has been treated with a pesticide, the chemicals in the pesticide may cause more serious medical problems for a pet than ingestion of the sap. Mistletoe and holly berries are more toxic than poinsettias and can cause more serious health problems for pets.
INVASIVE PLANT CONTROL
Now that leaves have long since fallen, winter is an excellent time to identify invasive plant species. Many of them are evergreen and easy to spot. This is also a good time of year to treat invasives, particularly if you are using an herbicide. There’s less risk of accidentally damaging native species that are dormant and protected by leaf litter. For more information on invasives, see the Blue Ridge Partnership for Regional Invasive Species Management’s (PRISM) article on identification and control of invasive plants in winter. See also the Invasive Plant Control Calendar in the May 2022 issue of The Garden Shed.
Featured image: bird on feeders in December snow storm. Photo: Pat Chadwick
Upcoming Events
Most gardeners view the presence of earthworms in their soil as a huge positive, but Dr. Linda K. Blum, a soil scientist in the University of Virginia’s Environmental Sciences Department and a Piedmont Master Gardener, will explain that earthworm activity isn’t all beneficial. For example, earthworms can increase greenhouse gas emissions from soils, disrupt nutrient cycling within the soil, and promote the movement of nutrient pollution from agricultural fields to adjacent waterbodies.
Dr. Blum’s talk will include many other surprising facts about the biology, geographic distribution, and ecosystem impacts of native and invasive earthworms. It will also provide information on how to identify and control the spread of the most recent invader, Amynthas agrestis, the Asian jumping worm.
⇒Register here for this free program.
Tuesday, December 5 @ 11:00 am – 3:30 pm on Zoom
Join the Chesapeake Bay Trust and the Blue Ridge PRISM for a robust conversation about invasive species — learn what common invaders we see across the watershed and the problems they pose, how invasive species are regulated, what maintenance practices have worked, what hasn’t worked, and how we can manage invasives properly through action and education. Our goal is to have a more holistic understanding of the problem and come away from the discussion with new management perspectives and techniques. For more information and to see the list of speakers, go to Blue Ridge Prism/Events.
⇒Register here
Yancey Community Center, Simpson Park Dr. Esmont, VA 22937
Join Tree Stewards Sherri and Becky to experience the forest and the diverse collection of hardwood and evergreen trees at Simpson Park in the community of Esmont in Southern Albemarle County. On this easy walk on a shaded gravel one-mile path, you will learn to identify trees without their leaves. You will discover how to recognize the unique bark between multiple species of white and red oaks. The size, shape and orientation of twigs and branches can assist you in easily differentiating between Hickory, Dogwood, and Redbud trees and more.
–limited to 15 participants (under 15 years, accompanied by adult)
⇒Find out more and register on Eventbrite here.
Black Walnut Trees
As a child, I loved swaying in the wind on a tire swing suspended from a sturdy branch of the black walnut tree on our property. That huge tree was also good for climbing because of its strong, upward-spreading limbs, although the rough, deeply furrowed bark could be a bit rough on the hands!

Gray, furrowed bark of black walnut tree with diamond patterns; photo: Melissa King
Description
The eastern black walnut tree (Juglans nigra) is a majestic deciduous tree native to eastern and central regions of the United States. A member of the Juglandaceae family, this large species boasts dense leaf cover with a beautiful oval crown. Classified as a perennial stone fruit tree, it is well-known for generous clusters of edible “drupes” (skin-covered, fleshy fruit with one central stone and seed), which we refer to as black walnuts.

Round stone fruit on black walnut tree; photo: Melissa King
The round, tough, green drupes, which turn brown as they ripen, are roughly 2 ½ inches in diameter. Beneath their bumpy outer covering, each drupe has a black husk (or hull) containing a substance that will stain clothing and skin, so be careful when handling drupes. Deep inside each drupe is a dark brown fruit (or kernel) commonly known as a black walnut. These drupes ripen in September to October, but no fruit will appear until the tree is at least 4 – 6 years of age, so don’t lose hope if your tree seems barren at first.

Pinnately compound leaflets droop downward on black walnut tree; photo: Melissa King
Black walnut trees grow up to 100+ feet tall, with 70-foot-wide canopies and trunks up to 6 feet in diameter. The dark gray bark is quite distinctive with a diamond-shaped pattern running vertically up the hefty trunk. The tree’s lance-shaped leaflets appear in pinnately-compound arrangements that tend to droop downward. These leaves turn golden yellow in autumn, dropping to the ground early in the fall and not re-appearing again until late spring. In fact, it takes so long for flowers and foliage to leaf out (late May) that one might easily think the tree is dead. On the bright side, many black walnut trees will live a long, productive life and often yield their greatest harvests after 30 years of age.
Reproduction
A black walnut tree is monoecious, with both male and female flowers appearing on the same plant in late May to early June. Male flowers are thin yellowish-green catkins, while female flowers develop as short, green, spiky clusters. Wind pollination is the primary method for reproduction, and regeneration frequently occurs when squirrels bury black walnuts in the ground around the tree.
Climate and Soil Requirements
Black walnut trees grow in zones 4 – 9. They prefer neutral pH and rich, well-drained soil (moist loam is best), but they tolerate drought and moderate, intermittent flooding. Their sizable tap root is deep and widely spread, which enables effective water collection in drier conditions. These trees are commonly found in riparian zones – transition spaces between forests, creeks, and rivers – or scattered on the edges of wooded areas. They thrive in full sun and will not do well in partial shade. Another noticeable characteristic is that a black walnut tree often appears as a “solo” in the landscape, without many other plants nearby. Why? Because it is allelopathic, or capable of suppressing the growth of other plants.
Toxicity
A chemical called juglone is found in the leaves, bark, roots, and nut husks of a black walnut tree. This toxic substance is a respiration inhibitor that can deprive other organisms of the energy needed for their own metabolic activity. Plants that are sensitive to juglone may exhibit negative symptoms rather quickly, turning yellow or brown, looking stunted, wilting, and eventually dying. Depending on the drainage and soil type of the affected area, juglone can remain present in the soil for extended periods of time.

Drupes from black walnut tree in different stages. photo: Melissa King
Juglone is strongest beneath the canopy of a black walnut tree, so it is best not to grow other plants or fruit trees within the drip line. The recommendation is to keep other plantings at least 70 feet away from this type of tree. Due to possible deleterious effects on other plants, avoid using wood chips, bark, or leaves from a black walnut tree as mulch on any garden beds. However, some plants, such as hickory, oak, and sycamore trees, can tolerate juglone and are less susceptible to the ill effects of that chemical. For a comprehensive list of plants that are either sensitive or tolerant of that toxic substance, visit this webpage.
Juglone may cause allergic reactions in some humans, but others may have negligible sensitivity to this chemical. Mild symptoms include hives or itchiness, and more severe reactions include trouble breathing, vomiting, fainting, or swelling of the face or throat. Dogs and other animals who consume moldy walnuts are subject to convulsions, so be sure to clean up fallen drupes under your own black walnut trees if you have pets. Fresh wood shavings from black walnut trees may lead to laminitis in horses, although well-aged shavings do not cause that problem.

Black walnuts fall from the tree when ripe, covering the ground under the canopy; photo: Mellissa King
One more cautionary note about planting location: A profuse crop of black walnuts can be hazardous. Drupes can fall onto pedestrians, who might also trip on them, so avoid planting this tree near sidewalks or residential driveways. Plus, it can be especially difficult to remove those dark stains from shoes!
Diseases
Black walnut trees are susceptible to some diseases. The most serious is walnut anthracnose, a fungal disease which leads to darkened leaf spots, premature leaf fall from the tree, and potentially reduced nut crop. An integrated pest management approach is recommended to control this disease before it becomes widespread in a black walnut tree. Another problem is thousand cankers disease (TCD), which begins when walnut twig beetles carrying fungal spores burrow into the bark to feed on healthy phloem tissue. This results in canker formation, or dead tissue beneath the bark, which impedes the flow of important nutrients throughout the tree. Unfortunately, there is no currently-known method to save a black walnut tree infected with TCD.
Value and Uses
In terms of wildlife support, the black walnut tree is a true winner! Black walnuts are a favorite treat for squirrels and birds, and deer will eat the young buds. The tree is a host plant for more than 100 different species of butterflies and moths, and eastern screech owls will make their homes in black walnut trees.

Full view of black walnut tree in autumn; photo: Melissa King
Black walnuts are known for their bold, earthy flavor and aroma, which many people like. We consume them raw or roasted, cook with them, and use them in a wide variety of baked goods, such as breads, muffins, and cookies. Black walnuts, which are low in carbs and high in fiber, are considered a “superfood” associated with certain nutritional benefits. Per serving, they offer a high level of protein content and omega-3 fatty acids, which support metabolism and cardiovascular health. The husks have antimicrobial and antifungal properties.

Split open shells reveal the dark husks of black walnuts; photo: Melissa King
Lumber from black walnut trees is highly prized for its strength and unique appearance. This hard wood is often used to make furniture, flooring, and veneer. Hull extracts are used to make dyes and in natural hair coloring treatments. In addition, ground up shells from the fruit have interesting applications: as a non-skid component of car tires, filler for dynamite and smokestack scrubbers, and for cleaning jet engines.
I’m happy to say that better understanding of this unusual tree has boosted my fascination with Juglans nigra.

If you crack open the hard shell of a black walnut, you’ll find the edible kernel. photo: Melissa King
Featured photo: Melissa King
Resources
Virginia Tech Dendrology Fact Sheet (vt.edu)
Virginia Tech Dendrology (vt.edu)
Black Walnut: A Favorite for Flavor – State Parks Blogs (virginia.gov)
PLANT SPOTLIGHT: Black Walnut (Juglans nigra) – Philadelphia Orchard Project (phillyorchards.org)
Black Walnut Trees (usda.gov)
Native Plant Profile: Black Walnut (usda.gov)
Black Walnut Toxicity (purdue.edu)
Working with the Black Walnut (psu.edu)
Walnut: Thousand cankers disease | Hortsense | Washington State University (wsu.edu)
North Carolina Forest Service (ncforestservice.gov)
Walnut | Diseases and Pests, Description, Uses, Propagation (psu.edu)
Black-Walnut-Toxicity.pdf (wisc.edu)
The Toxicity Of Black Walnut Trees – Necps
Wintertime identification of black walnut – MSU Extension
Native Plant Profile Juglans nigra (MD DNR)
Black walnut trees threatened by Thousand Cankers Disease – MSU Extension
https://hortsense.cahnrs.wsu.edu/fact-sheet/walnut-anthracnose-blotch/
Guide to Poisonous Plants – College of Veterinary Medicine and Biomedical Sciences (colostate.edu)


