
The Garden Shed
A Community Newsletter published by the Piedmont Master Gardeners
August 2024-Vol.10,No.8


For comments, questions or suggested topics for future Garden Shed articles contact us at: garden-shed@piedmontmastergardeners.org.
If you have specific gardening questions or need help to solve a gardening problem, our Horticultural Help Desk is a free community resource and can be contacted at 434-872-4583 or by email: albemarlevcehelpdesk@gmail.com.

Who We Are
We are members of the Piedmont Master Gardeners, which simply means we have all been trained to share the scientific expertise of Virginia Tech and the Virginia Cooperative Extension Service. More important, we are your friends and neighbors with a passion for gardening – and learning more about it. MORE
Table of Contents
In the Edible Garden
August is a busy month in the edible garden as we wrap up many summer crops and get started with fall plantings.
Tasks and Tips
August in the Ornamental Garden
As much as we gardeners are tempted to take a break from our gardening chores this month, unfortunately, weeds, insects, and diseases don’t take a vacation.
In the Ornamental Garden
Tall Perennials in the Landscape
Tall perennials play an important role in larger landscapes or even in smaller landscapes where a vertical focal point is needed.
Knowledge is a powerful tool
August in the Edible Garden
August is busy in the edible garden as we enjoy harvesting summer vegetables while making new plantings of fall crops. As noted in Virginia’s Home Vegetable Garden Planting Guide, August is harvest time for beans, cucumbers, eggplant, melons, okra, onions, peppers, potatoes, squash, corn and tomatoes. At the same time, we can plant beets, broccoli, brussels sprouts, cabbage, carrots, cauliflower, many greens, lettuce, radishes, rutabaga, squash and turnips. When planting, remember that the warming climate has changed the VA Piedmont’s Hardiness Zone from 7a to 7b, which changes our average first frost date from October 15 to 25 to October 25 to November 5. So for fall crops, consider the time from planting to harvest, and plant early enough to minimize frost damage risk.

Cultivate Charlottesville’s August Garden at CATEC. Photo: R Morini
Summer Crops
Watering, hygiene, and harvest timing are key to extending yields of summer vegetables. The 1 inch of water per week rule is a good guide. Be more generous when it is really hot and dry. Insert a finger in the soil a couple of inches to test moisture if in doubt. Deeper, less frequent watering is more effective than frequent light watering, since the moisture will penetrate further into the soil where the plant roots are growing. Removing diseased and damaged vegetation from the garden and keeping garden tools disinfected is also essential. Since a plant’s job is done when it has created viable seed, pick vegetables before they reach full maturity to keep plants producing.
August is the peak of tomato season.
Depending on variety and planting timing, determinate tomato varieties may be presenting a full harvest now. Indeterminate plants can be kept productive until frost with good care. Pull off suckers, trim diseased leaves with disinfected tools, give a small fertilization boost if you haven’t amended the soil since planting, and keep them well watered.
If your tomato plants have yellow, spotted, or brown patches on leaves, they may have nutritional deficiencies or one of a variety of diseases. General advice is to remove discolored leaves with a disinfected shears, then bag, and trash the diseased foliage. For help in identifying and treating possible causes, check out The Garden Shed article Tomato Diseases.
If the fruits are slow to ripen, the article Why Aren’t My Tomatoes Ripening, from the Cornell Extension, explains why. At temperatures above 85° the plants don’t produce the lycopene and carotene compounds that cause the reddish color. We can influence ripening by picking tomatoes when the first blush of color change occurs, storing them at 70-75° in a dark, enclosed environment (I use a paper bag), and maybe adding other fruit, like bananas, to generate the ethylene gas that causes ripening to happen. The taste compromise is minimal compared to vine-ripened fruits. This is also a good way to protect tomatoes from invading varmints and to save late-season fruits that are threatened by frost.

Blossom end rot. Photo: R Morini
If fruit damage is the issue, get help identifying the problem from the Missouri Botanical Garden article Tomato Fruit Problems. Good guidance on managing blossom end rot is provided by the Wisconsin Extension article Blossom End Rot. Record identified problems in your journal so that next spring you can look for seeds or transplants that are resistant to the diseases identified and note care advice that can help with nutritional or moisture-related issues.

Braconid wasps on Hornworm. Photo: R Morini
Managing Pest Issues
Pests can also hurt your tomato harvest. Tomato hornworms are a common one. The key sign of their presence is denuded leaf stems. Pick and squish if you find a clean caterpillar. If it looks like the hornworm in the photo, leave it alone. The white cylinders on its back are beneficial braconid wasp cocoons. The adult wasp injects eggs into the hornworm. Larva feed on the worm’s innards until ready to pupate, and then they exit and spin cocoons as shown. Tiny adult wasps emerge a short time later. The hornworm may live through the wasp cycle but will die before pupating.
A variety of other pests can attack our gardens in August. The Garden Shed article Eleven Common Garden Pests: Identification and Management can help identify specific pests and treatments.

Healthy Kale. Photo: R Morini
Building a diverse ecology in the yard and garden is step one for creating a natural pest control system. I’ve been working over the past few years to add pollinator plantings, end chemical use, rotate crops, interplant, etc. Reduced damage done by Japanese beetles and cabbage worms, previously extensive, has been significantly lower. I attribute this to larger beneficial insect and bird populations on the property which contains numerous native trees, including “keystone” white oak trees. Increasing biodiversity can definitely help reduce pest invasions.
More Gardening Tips and Tasks for August:
- When choosing vegetables for the fall garden, check seed packets or catalogs, and select semi-hardy varieties that will tolerate a light frost and require fewest days to harvest.
- Fall plants often have fewer insect problems because they avoid the peak insect activity of midsummer. However, some insects, such as cabbage worms and corn earworms, may be worse later in the year than in the summer. Avoid some pests and diseases by rotating crop families to different bed areas than those where they were planted in the spring.

DIY compost after 4 months. Photo: R Morini
- When planting fall crops, prepare the soil by restoring the nutrients removed by spring and summer crops. A well-tended spring compost batch should be ready to be screened and spread on beds with a light application of a balanced organic fertilizer to replenish soil for fall crops.
- Dry soil can make working the soil difficult and inhibit seed germination. Plant fall vegetables when the soil is moist, either after a rain or after you’ve watered the area the day before planting. Plant the seeds slightly deeper than recommended for spring planting. Once planted, water them thoroughly.
- Watering properly is the key to conserving water and maintaining plant health in the heat of the late summer. One inch per week applied at one time will wet the soil 6 to 8 inches deep and ensure good yield from mature crops. Two inches of organic mulch such as chopped leaves or straw will cool the soil and reduce surface evaporation. Water the garden early in the day so the foliage dries before nightfall. Wet foliage at night increases susceptibility to fungal diseases.

Cabbage worms on kale. Pnoto: R Morini
- If you have a problem with cabbage worms on your cole crops (cabbage, kale, collards, broccoli, cauliflower, brussels sprouts), consider using floating or hoop-supported row covers. The Garden Shed article Row Covers: A Garden Season Extender with Benefits offers “how-to” advice. Pick worms off the plants when you see evidence of chewing or excrement on the plants. For extreme infestations, use Bacillus Thuringiensis (Bt), a relatively safe organic pesticide as per label directions. If you protect your plants until the first frost, you can enjoy harvesting many of these vegetables well into winter. For more detailed info on the problem and solutions, refer to The Garden Shed article OMG, What’s Eating the Broccoli.
- If vining crops like squash and pumpkins are taking up too much of your garden space, it’s ok to pinch off the growing tips. This causes the plant to put more energy into fruit maturity, less into vegetative growth.
- Harvest potatoes when the vines turn completely brown. Brush dirt off tubers when harvesting and don’t wash until just before use. Cure for a couple of weeks in a cool, dark place to allow skins to harden. If tubers are damaged when harvesting, use them immediately since they tend to spoil quickly. Also, cut away any green parts of potatoes since they are bitter and can cause gastric distress if a large amount is eaten. More info is available from the article Homegrown Potatoes Tell You When to Harvest Them by the Michigan State Extension.
- If you have never investigated corn pollination (hint: every tassel has to be pollinated by at least one pollen grain to create a fully kernelled ear), find an interesting explanation in the article The Corn Pollination Process from the Wayne County OSU Extension.
- Bulbing onions should be harvested when half their leaves are dried and fall to the ground. Harvest when soil is dry to minimize disease susceptibility. Allow them to cure for a few days. Remove dirt, cut off tops within 1-3” of the bulb, trim the roots, and leave the outer skin in place. Store them in a cool dry place.
- Garden vegetables that become over-ripe are easy targets for some pests. Remove ripe vegetables promptly.
- When harvesting, don’t let your produce sit in the hot sun. Cover, or even better, keep them cool, to prevent wilting, loss of succulence, and conversion of natural sugars to starch.
Hang in There
It’s easy for gardeners to slack off in August. Spring plants have expired, we’ve been fighting both pests and the weather all summer, and we’re hot and tired. But if we stick it out, fall gardening can be really rewarding. Refresh the soil, plant the fall crops you enjoy the most, and you’ll be able to have fresh garden produce well into, if not through, the winter.
Thanks for visiting us at The Garden Shed. I hope to talk again next month.
Sources:
Monthly Gardening Tips, PMG Website: https://pmgarchives.com/gardening-questions/monthly-gardening-tips/#August
“August Monthly Tip Sheets -Vegetables,” https://albemarle.ext.vt.edu/content/dam/albemarle_ext_vt_edu/files/hort-tip-sheets/8-14-vegetables.pdf
Monthly Tips and Tasks, Missouri Botanical Garden: https://www.missouribotanicalgarden.org/gardens-gardening/your-garden/help-for-the-home-gardener/advice-tips-resources/gardening-by-month/august.aspx
Feature photo: Piedmont Master Gardeners Cleve and Fern Campbell’s vegetable garden in August by R. Morini
Tall Perennials in the Landscape
Garden centers offer many shorter, compact perennial choices these days for use in landscapes with limited gardening space. But if you have a spacious landscape, a meadow, or a “wild” garden, then taller, bulkier perennials may be more suitable choices. Read on as I illustrate this point by taking you for a quick tour of the taller perennials on my property.
THE ORIGINAL PLAN
When I designed the landscape for our home south of Charlottesville 13 years ago, I had four specific goals in mind for our treeless 3.5-acre lot: Install foundation plantings around our newly built house, plant a variety of trees and shrubs, develop a fairly large perennial garden, and install raised beds for a vegetable garden.
Those projects replaced some of the grass on our lot (which was previously a featureless cow pasture), but we still had a lot of grass left to mow. So, I decided to landscape the area adjacent to the 550-foot long plank fence that borders our back yard. Using the fence as a backdrop, I envisioned deep, 15’ to 20’ undulating beds filled with woody and herbaceous plants. A mixture of trees and shrubs (the “bones” of the garden) was installed first. Then, I planted drifts of yarrow, asters, hardy mums, and Rudbeckia among other perennials. Wild violets filled in some of the sunnier areas as a ground cover. Hardy geraniums, Tiarella, and wild ginger served as ground covers in another, partly shady area. Eventually, the perennials began to fill the spaces between the trees and shrubs, and all was well – for a time.
THE PLAN GOES AWRY
As the landscape plantings matured, I saw that too many of my original perennial plant choices were mound shaped. That made the design look monotonous. Also, some grew too low to the ground (1.5’ to 2’ on average), making them difficult to see from a distance. That’s when I realized the design needed tweaking. It needed additional plants that would:
- Fill the void between the lower-growing perennials and the trees and shrubs that had grown much taller.
- Be clearly visible from our house, which is about 180′ from the fence.
- Provide vertical elements to contrast with all the lower, mound-shaped forms.
- Be pollinator friendly and provide habitat for wildlife species.
- Fill in large areas over time as a lawn replacement.
GETTING STARTED WITH TALL PERENNIALS
More shrubs would not have solved this problem. They would have been too heavy, too dominant. The design needed a “lighter” touch, which is why I chose tall perennials of 4’ or more to provide a more naturalistic, layered look.
So, my experiment with tall perennials began with grasses. Starting with groups of ‘Karl Foerster’ feather reed grasses (Calamagrostis x acutiflora) (4’ tall by 2’ wide), I noticed how the feathery seed heads in mid-summer stretched higher than the top fence rail and added an interesting softening contrast with the solid boards on the fence. ‘Apache Rose’ Switch grasses (Panicum virgatum) (4’ tall by 2.5’ wide) added additional height and pleasing texture from late summer all the way through the winter months. So far, so good.

‘Karl Foerster’ Feather Reed Grass. Photo: Pat Chadwick
In addition to these two grasses, I gradually added a variety of other tall perennials, such as:
False Aster (Boltonia asteroides) – Due to its relaxed habit, this 5’ to 6’ tall by 4’ wide perennial is well suited for an informal cottage or “wild” garden setting. I became interested in Boltonia years ago at a friend’s house where I saw the plant gently cascading over a stone wall in late summer. It was covered in a billowing mass of 1” white blossoms with yellow centers. Because it does tend to be floppy, it should be cut back by about a third in May or June to stimulate a bushier, more compact habit. Otherwise, it may need to be staked. I grow the straight species, but most sources recommend ‘Snowbank’, a shorter, better-behaved cultivar.
Joe Pye Weed (Eutrochium fistulosum) – This 7’ tall native is often seen growing along roadsides all over the east coast. As a host plant for a variety of bee, butterfly, and moth species, Joe Pye Weed is well regarded as a good nectar plant for visiting pollinator species. The mauve-pink flower clusters appear in July, when there’s not much else going on in the garden. The plant can be cut back by half in early June to control its height. Alternatively, check out one of the “dwarf” cultivars such as Baby Joe (4’ tall) or Gateway (4’ to 6’ tall).

Joe Pye Weed (Eutrochium fistulosum). Photo: Pat Chadwick
False Blue Indigo (Baptisia australis) – Most sources say this plant grows between 3’ and 4’ tall and 4’ wide, but when in flower, it tops out at more than 4’ in my garden. I am aware that some hybridized varieties such as ‘Purple Smoke’ can top out at 5’. I love this plant because the vertical spikes of stunning lavender-blue flowers can easily be seen from a distance in my landscape. After it finishes blooming in spring, it tends to flop over a bit, probably because of the weight of the seed pods. However, shearing it back by a third removes the seed pods and solves the flopping problem.

False Blue Indigo (Baptisia australis). Photo: Courtesy of Missouri Botanical Garden Plant finder
Common Milkweed (Asclepias syriaca) – Having grown up on a farm where this large, coarse-looking plant was an agricultural pest, I am not a big fan of it. However, common milkweed is a critical host plant for Monarch butterfly larvae as well as an important host for other species such as those listed in the U.S. Fish and Wildlife’s blog on Milkweed – For More than Monarch Butterflies. For this reason, I do grow it in my landscape where it tops out at nearly 7’. It can spread aggressively into large colonies. So, I am watching it to make sure it doesn’t get out of control.

Common Milkweed (Asclepias syriaca). Photo: Pat Chadwick
Culver’s Root (Veronicastrum virginicum) – This 4’ to 6’ tall by 4’ wide plant provides a good strong vertical contrast to all the mound-shaped plants in my garden. The flowers appear as 6” to 9” long racemes (spikes) in mid-summer and last for about 4 to 6 weeks. After it finishes blooming, it can be cut back hard, which encourages it to generate fresh new growth. A few cultivars of this plant are available displaying pale lavender or pinkish flowers, but I prefer the straight species, with its white flowers.

Culver’s Root (Veronicastrum virginicum). Photo: Courtesy of Missouri Botanical Garden Plant finder
Cup Plant (Silphium perfoliatum) – Whether you call it cup plant, Indian cup plant, or rosinweed, this 4’ to 6’ tall plant makes a bold statement in the mixed border. It has attractive large leaves, strong stalks, and 3” to 4” yellow, sunflower-like blossoms in mid- to late summer. Although native and therefore not technically invasive, this clump-forming plant can spread aggressively. I have plenty of room for it in my mixed border, but I keep it deadheaded so that it doesn’t seed where it’s not wanted.

Cup Plant (Silphium perfoliatum). Photo: Courtesy of Missouri Botanical Garden
Cutleaf Coneflower (Rudbeckia laciniata) ‘Herbstsonne’ — ‘Herbstsonne’, which translates to ‘Autumn sun’, is a favorite cultivar of cutleaf coneflower. In the third edition of his reference book on Herbaceous Perennial Plants, author Allan Armitage refers to ‘Herbstsonne’ as “one of the finest coneflowers in cultivation” and “…the king of the sunny fall garden.” As the name suggests, the blossoms on this 5’ to 7’ tall by 4’ wide perennial are a strong yellow color with green cones. The flowering period generally lasts from August through October. If this plant grows taller than you would like, it responds well to being cut back to a leaf node lower on the stem. I have sometimes cut it back twice during the growing season – once in May and again in June or early July – to control its height.

Cutleaf Coneflower ‘Herbstsonne’ (Rudbeckia laciniata). Photo: Courtesy of Missouri Botanical Gardens Plant finder
Perennial Sunflower (Helianthus laetiflorus ‘Lemon queen’) – While there are other perennial Helianthus species that are more appealing, this natural hybrid of two perennial species happens to be the one I bought at a local plant sale some years ago. I was attracted to the idea of having hundreds of yellow blossoms in mid-summer when my garden normally goes on a break. It easily tops out between 5’ and 7’ and is perfect for the back of the border. It does, however, spread with wild abandon (translation: it is aggressive!). When it grows out of its allotted space, it’s very easy to pull up. It more than makes up for its aggressiveness when it starts blooming in July and is covered with butterflies.
Tall Coreopsis (C. tripteris) – This species tops out at between 7’ and 9’ and is a giant compared to shorter, 1’ to 2’ varieties such as lanceleaf (C. lanceolata) or threadleaf (C. verticillata). Tall Coreopsis has a long bloom time starting in late July and lasting for about two months. When in bloom, the numbers of insects attracted to it are unbelievable. Various pollinator species flock to the bright yellow flowers and goldfinches love its seeds. I grow ‘Gold Standard’, a 5’ to 6’ tall cultivar that is shorter than the straight species. According to the Mt. Cuba Center plant trial information, ‘Gold Standard’ has strong stems that never flop and is sturdier than the straight species.

Tall Coreopsis (Coreopsis Tripteris). Photo: Pat Chadwick
GENERAL OBSERVATIONS ABOUT TALL PERENNIALS
Before introducing any new plant to your garden, research it thoroughly to make sure you know what you are getting into. For example, make sure you know how large the plant will be after it’s been in the ground for several years. Some of these taller perennials may spread well beyond the space allocated to them. That may be beneficial if, like me, you want plants that can eventually fill in a larger area. But if you’re concerned that a plant may spread too aggressively in your landscape, then opt for other, “better behaved” species more suitable for your needs.
Keep in mind what the plant will look like throughout the growing season. In his book New Naturalism, author Kelly Norris advises us that: “It’s easy to lean heavily on the later lushness of tall perennials, which form a green umbrella of vegetation over the ground, but these don’t jump to life in the first two weeks of spring.” In other words, many of these plants don’t offer any clues as to their final size when they are just emerging in spring, so it can be a shock when they reach their full height and width later in the growing season and tower over your other plantings.
If you want to add taller perennials to your own landscape, then choose a plant height that makes sense for you. In my landscape, tall perennials of at least 4’ or more made sense because of the height of the plank fence behind the plantings plus the size and shape of plantings already in place. But that may be too tall for some landscapes. Fortunately, many excellent shorter perennial species fall within the 3’ to 4’ tall range, such as gayfeather (Liatris Spicata), some beebalm (Monarda) varieties, and purple coneflower (Echinacea purpurea).

Coneflowers (Echinacea purpurea) in mixed border. Photo: Pat Chadwick
IN SUMMARY
My landscape continues to be a work in progress. There’s still a lot of work to be done, but the tall perennials I’ve added so far make the entire fencerow look much more interesting. It’s a little wilder looking now, but it’s a look I can live with. I’m also pleased that the plants are providing pollen and nectar for beneficial insect species as well as nesting material and habitat for the many birds, small mammals, and amphibians that visit my back yard.
FEATURE PHOTO: Pat Chadwick
SOURCES
Armitage’s Native Plants for North American Gardens (Armitage, Allan M., 2006)
Herbaceous Perennial Plants, 3rd Edition (Armitage, Allan M., 2008)
Native Plants of the Southeast, A Comprehensive Guide to the Best 460 Species for the Garden (Mellichamp, Larry, 2014)
New Naturalism (Norris, Kelly D., 2021)
Tall Perennials, Larger-than-Life Plants for Gardens of All Sizes (Turner, Roger, 2009)
The Magic of Moths
When you think of moths, what comes to mind? Maybe you remember the annoying ones beating against the porch light and flying in the open door, the clothes moth that chews hole in your silk or wool garments, or the big green caterpillar called the tobacco hornworm that devours your garden tomatoes. Do you think of the dreaded spongy moth (previously known as the Gypsy moth) that wreaks havoc on trees? While a nuisance or even destructive, these bothersome species are only a few of the moths found worldwide. Moths come in a myriad of shapes and sizes and most do not deserve this bad reputation. Moths and butterflies belong to the order Lepidoptera, but moths out-number their better-known cousins. According to the Smithsonian, there are about 160,000 species of moths worldwide and 11,000 of these species reside in North America. In contrast, there are 17,500 species of butterflies in the world. Moths are also older than butterflies. Moths co-evolved with angiosperms, or flowering plants, and the oldest moths arrived some 300 million years ago. Moths developed their long, tube-like proboscis and started pollinating flowering plants about 241 million years ago. They pre-date bees which appeared about 113-132 million years ago. Butterflies evolved from moths about 100 million years ago and so are the youngest of the group. Moths have been laboring in relative obscurity for millions of years while bees and the more famous Lepidoptera, butterflies, have been widely studied. Recent studies are learning more about moths and their contributions to pollination and the ecosystem. It is time to pull back the veil and learn more about these fascinating creatures.
Butterfly or Moth
Many moths and butterflies are similar in appearance but there are striking differences. While there are no hard and fast rules, here are some key differentiators:
- Butterflies are usually diurnal (active during the day).
- Moths are usually nocturnal (active at night) or crepuscular (active at dawn and dusk).
- Butterflies often have brightly colored wings.
- Moth wings tend to be earth colored with muted patterns.
- Butterflies rest with their wings folded upright and together.
- Moths tend to rest with their wings flat or over their bodies, covering their abdomens.
- Butterflies have long, slender antennae, often with a clubbed ends.
- Moths usually have short antenna that may be feathery.
- Butterfly bodies and legs are long and thin.
- Moth bodies and legs are short and plump.
- Butterflies pupate in a chrysalis. Butterfly larvae (caterpillars) shed their skin several times as they grows. In their final molt, they form a protective skin called a chrysalis from which adult butterflies emerge.
- Moths pupate in a cocoon. Moth caterpillars do not make a protective shell from their own bodies, but spin silken threads around themselves, forming a hard casing called a cocoon. Sometimes they spin dirt or leaves into the cocoon to help camouflage it. Adult moths emerge from the cocoons.
Moths as Pollinators
All day long, the garden is full of life as butterflies, bees, wasps and beetles go about their business pollinating plants. When the sun goes down these diurnal creatures turn in, and nocturnal pollinators, moths, take over. With twice as many moths as there are bees, and six times as many pollinating moths as there are pollinating butterfly species, their contribution to the reproduction of plants cannot be ignored. Like butterflies, moths get their nutrients by sipping nectar from flowers. In doing so, they pick up pollen on their hairy bodies and spread it from flower to flower, allowing the plant to reproduce. Moths visit a variety of flowers, including some that bees, the powerhouse pollinators, do not visit. Moths also can fly longer distances than bees, enabling them to visit a diversity of floral groups across the landscape, increasing biodiversity.
While we have learned more about moth contributions to pollination, the relationship between moths and plants is complex and still being studied. Moths evolved with plants and have adapted to one another. The body size and mouth shape of insects relate to the shape and size of flowers, determining which are the best pollinators. Moths and butterflies with their long proboscises can drink nectar deep in tubular flowers. Color plays a role as moths are attracted to white or light-colored flowers which are easy to see at night. Some flowers are nyctinastic and close at sunset but others stay open or open in the evening making nectar and pollen available for the night shift. Some species of plants and moths depend on one another to complete their life cycles. In the 19th century, Charles Darwin noticed that some orchids in Madagascar had nectar at the end of 12-inch long tubular flowers. He hypothesized that these orchids could only be pollinated by moths with proboscis long enough to reach deep into the flower. His ideas were controversial at the time and were only proven when a moth with a 12-inch proboscis was discovered many years later. The yucca plant (Hesperoyucca whipple) is only pollinated by the yucca moth (Tegeticula maculata). In this unusual relationship, the female moth gathers pollen grains from the flower at night and carries them in her mouth to another yucca flower. She pollinates the plant by depositing her egg and pushing in the pollen. When the larva hatches, it feeds on the seeds that have developed.
In addition to their value to wild and landscape plants, moths should get more credit for their contribution to agriculture. Studies at the University of Arkansas found moths congregating on blueberries, blackberries and peaches. When studying apples, they found that moths pollinate as many blossoms at night as bees pollinate during the day. This is a complex relationship, however as there is a paradox. The larvae of two of the common moths found at night in apple orchards are the cutworms and army worms which feed on vegetation and can harm apple trees. More study is needed to see if and how this paradox can be managed and which other crops benefit from night pollination.
Some Common Moths
Moths cannot be pigeonholed as they have a have a variety of physical characteristics and habits. Some are large, others small. Some are brightly colored, others drab. Some are diurnal, others are nocturnal or fly at dawn and dusk. Many are important pollinators, others do not feed as adults. All larvae (caterpillars) feed voraciously until they pupate. Most feed on a variety of plants and do little harm. Others are known as agricultural pests. All moths and their caterpillars are part of the food web and integral to the ecosystem. Moth species are prolific so it is and impossible to list more than a few here. The following are a some moths commonly seen in the Mid-Atlantic.
Hummingbird clearwing-Moth, Photo by Steven-Katovich-Bugwood.org.
Sphinx and Hawk Moths (Family Sphingidae)
Sphinx and Hawk moths are among the most visible and interesting moths. There are about one hundred species of moths from the Sphingidae family in North America. Sphinx moths are large insects with stout abdomens and large front wings and don’t look like our idea of Lepidoptera. With fast moving, buzzing wings, they are often mistaken for hummingbirds. Some are nocturnal but many fly during the day. Excellent flyers, some species fly up to 30 miles per hour and can fly sideways. They rapidly beat their wings to hover above flowers, extending their long proboscis deep into blossoms without landing. The snowberry clearwing (Hemeris diffinis) and the hummingbird clearwing (Hemaris thsysbe) are both diurnal and are often encountered in the home garden. Snowberry clearwings have yellow and black bodies and clear wings. Their resemblance to bumble bees help protect them from predators. Hummingbird clearwings have a similar shape and size as snowberries, but their red and olive green coloring emphasize their resemblance to hummingbirds. Snowberry and hummingbird clearwings drink nectar from a variety of flowers and their caterpillars feed on native bee balm, phlox, milkweed, thistle, honeysuckle, dogbane, hawthorne, viburnum, cherry and plum trees. They are not a significant pest in orchards since so many other host plants are available.

Luna Moth Photo by Deborah Harriman
Clearwing Moths (Family Sesiidae)
Clearwings have smooth rather than hairy bodies, transparent wings, and yellow and black patterns on their bodies. They resemble wasps, making them unattractive to predators. Like sphinx and hawk moths, clearwings feed on nectar during the day. Their larvae burrow into the stems of host plants, sometimes causing damage. The eupatorium borer (Carmenta bassiformis) often feeds within the stems of ironweed and Joe Pye weed.
Silkworm and Royal Moths (Family Saturniidae)
The members of this family are often colorful and some can be as large as a human hand. They do not have mouth parts or digestive systems so do not feed as adults or visit flowers. The live off the energy reserves they stored as caterpillars and devote their short lives to seeking mates and reproducing. They are not pollinators, but as both adults and caterpillars, they are food for predators and part of the food web. They fly at night so are not often seen. These moth caterpillars feed on hardwoods such as wild cherries, oaks, hickories and walnuts. Many of these moths are beautiful. Common moths in the family Saturniidae are luna (Actias luna), Io (Automeris io), rosy maple (Dryocampa rubicunda) and polyphemus (Antheraea polyphemus).

Giant-Leopard-Moth-Rebekah-D.-Wallance-University-of-Georgia-Bugwood.Org_.jpg
Tiger Moths (Family Arctiidae)
Some members of this family are brightly colored and rely on chemical defenses rather than camouflage for protection. They visit flowers in gardens and along roadsides for nectar. Arge moths (Gramma arge) are large and can be white, orange, or pink with black strips and dots. The harnessed tiger (Apantesis phaletera), giant leopard (Hypercompe scribonia), and milkweed tussock (Euchaetes egle) are also members of this family. Fuzzy “wooly bear” caterpillars can be seen in late summer and tussock moth caterpillars sporting fuzzy spines are larvae of tiger moths. Tiger moth caterpillars feed on a range of native and other plants such as apple, cherry, dandelion, oak, sunflower, violets and walnut.
Owlet Moths (Family Noctuidae)
Owlet moths are a large family and a very common group. Unfortunately, some in the family have a bad reputation: cutworms and army worms are agricultural pests. Adult owlets, however, are great pollinators. They visit goldenrods, asters, rudbeckia, gaillardia, witch-hazel and columbine. Some also feed on plant sap and rotting fruit. Most owlets are small, stout, and drab, camouflaged with lines and spots to resemble tree bark. Some fool predators with coloring that resembles bird droppings. Others are colorful, their bright markings indicating their toxicity to predators. They are nocturnal and attracted to lights.
Threats to Moths
Like butterflies, bees and other pollinating insects, the number of moths has decreased alarmingly. Habitat loss, pesticides and the proliferation of invasive species overtaking native plants have all contributed to decline of moth populations. Air and light pollution add to the threats to nocturnal pollinators.
Researchers at the University of Washington found that hawk moths and sphinx moths use their antennae to detect nectar in primroses as far away as a mile. However, NO3 , a common pollutant formed from car emissions and other industrial sources, builds up in the air at night and degrades the scent of flowers. Experiments showed that hawk moths and white-lined sphinx moths had trouble flying in the presence of NO3 at the levels found at night in urban areas; researchers determined that moth visitation to flowers dropped by 70% in the presence of NO3. While this study only included two species, it indicates that air pollution affects the plant community and its pollinators in a big way.
Researchers at Florida International University have studied the effects of artificial lights on moth behavior. It is believed nocturnal moths have great low light vision and that too much light causes problems for them. Moonlight and starlight actually help moths maneuver at night and helps them travel long distances. In the presence of bright, artificial light, however, moths become disoriented. For reasons not understood, they are attracted to bright lights, as in the saying, “like a moth to the flame.” The tendency to fly toward artificial lights is fatal. When moths get near bright lights, they no longer act like night pollinators. They stay stunned near the light source and don’t look for mates. The stunned moths become prey to predators and, by not pollinating, reduce seed production. The amount and brightness of lights in urban and residential areas has increased and is contributing to the decline of moth populations.
Gardening for Moths
Sometime around 2600 BC, a silkworm cocoon dropped into the teacup of the Chinese Empress Leizu. She unwound the threads, discovered silk and soon mulberry trees were cultivated for silk production. Today, more than 700,000 tons of silk are produced annually by domesticated Asian silkworms. Home gardeners can create a haven, if less grandiose, to attract moths. To create a moth-friendly habitat, select the same native trees, shrubs and perennials that attract bees and butterflies. Joe Pye Weed (Eupatorium maculatus), goldenrods (Soildago) and rose mallow (Hibiscus moscheutos) are useful varieties for moth pollinators. In addition, here are some additional plant types important to moths.
- Pale and light-colored flowers that reflect moonlight and are easier for nocturnal moths to find in the dark
- Flowers that stay open at night such evening primrose (Oenothera biennis)
- Blossoms with long, tubular blossoms such as foxglove beardtongue (Penstemon digitalis) and scarlet beebalm (Monarda didyma) to accommodate the long tongues of moths
Nectar-feeding moths also feed on tree sap and rotting fruit. Gardeners should also protect moth caterpillars by providing host plants for them to eat. This is especially important for moths that do not feed as adults. In the Mid-Atlantic and Southeast, some moth-attracting plants for both adults and caterpillars are oak (Querucs species), willow (Salix), chokecherry (Prunus virginiana), spicebush (Lindera benzoin), and buttonbush (Cephalanthus occidentalis).
See Piedmont Master Gardeners, Creating Habitat for Lepidoptera in The Garden Shed for more information.

Rosy maple moth has no mouth parts
Photo by Deborah Harriman
Summary
- Moths outnumber their Lepidopteran cousins, butterflies, almost ten to one.
- Most moths, both diurnal and nocturnal, are important pollinators.
- Moths undergo complete metamorphosis: egg, larva, pupa and adult.
- Some moth caterpillars are agricultural pests, but most feed harmlessly on wild plants.
- Moths are important to the ecosystem. In their adult and larval stages, they are food for birds and other animals, contributing to the food web.
- Some adult moths do not feed, live only a short while, and exist only to mate and reproduce.
- Moths are diverse in size, shape and color. Some are muted with colors that camouflage them from predators. Others are brightly colored and deter enemies with chemical properties. Some are tiny, others as large as a human hand.
- Plant flowers for nectar and host plants for caterpillars.
- Avoid pesticides.
- Turn off outside lights.
Sources
Air Pollution Hurts Pollinators, Xerces Society
Gardening for Butterflies, The Xerces Society, Timber Press, 2016
Into the Night: Shedding Light on Nocturnal Pollinators, University of Arkansas Division of Agriculture
Moths are the Unsung Heroes of Pollination, Smithsonian Magazine, July 28, 2022.
Moths, Butterflies and Pollinations, University of Maryland, Maryland Agronomy News
Moths – The Forgotten Pollinators, Penn State Extension, Monroe County News
Make Your Garden a Haven for Moths, NC State Extension
Noctuid Moths, Missouri Department of Conservation
Owlet Moths (Mesogona olivata), U.S. Forest Service, U.S. Department of Agriculture
These Moths are so Gorgeous, They “Put Butterflies to Shame”, Smithsonian Magazine, July 19, 2021.
New Research from Riffell Lab On Air Pollution Affecting Nighttime Pollinator Activity University of Washington
Feature Photograph:
Io Moth, Photo by Sturgis MdKeever, Georgia Southern University, Bugwood.org
Upcoming Events
PMG Speakers Bureau: Saving Dark Skies
August 6 @ 6:30 pm – 7:30 pm

Light pollution is making nights almost 10 percent brighter every year. The disappearing darkness not only limits our view of the stars but also has serious implications for the health of all living things. Biological processes have evolved with our planet’s rhythm of night and day. Lighting up the night disrupts this predictable cycle. In addition, excessive outdoor lighting is disorienting and often fatal for migrating birds, nocturnal flying insects, and baby sea turtles.
The good news is that light pollution is fixable. Join Master Gardener Christine Hirsh-Putnam and Monticello Curator of Plants Peggy Cornett to learn more about the impact of light pollution and the many ways we can mitigate it.
This in-person program is hosted by the Piedmont Master Gardeners and The Center at Belvedere and is free and open to all. Register here to attend.
Tree Steward Training Begins
August 6 @ 7:00 pm – 9:00 pm
Registration is Now Open for the Tree Steward Training.
Classes begin August 6th.
Brown Bag Webinar: The Problem with Wavyleaf Grass and What to Do About It
Wednesday, August 14 @ 12:00 pm – 1:00 pm
FREE
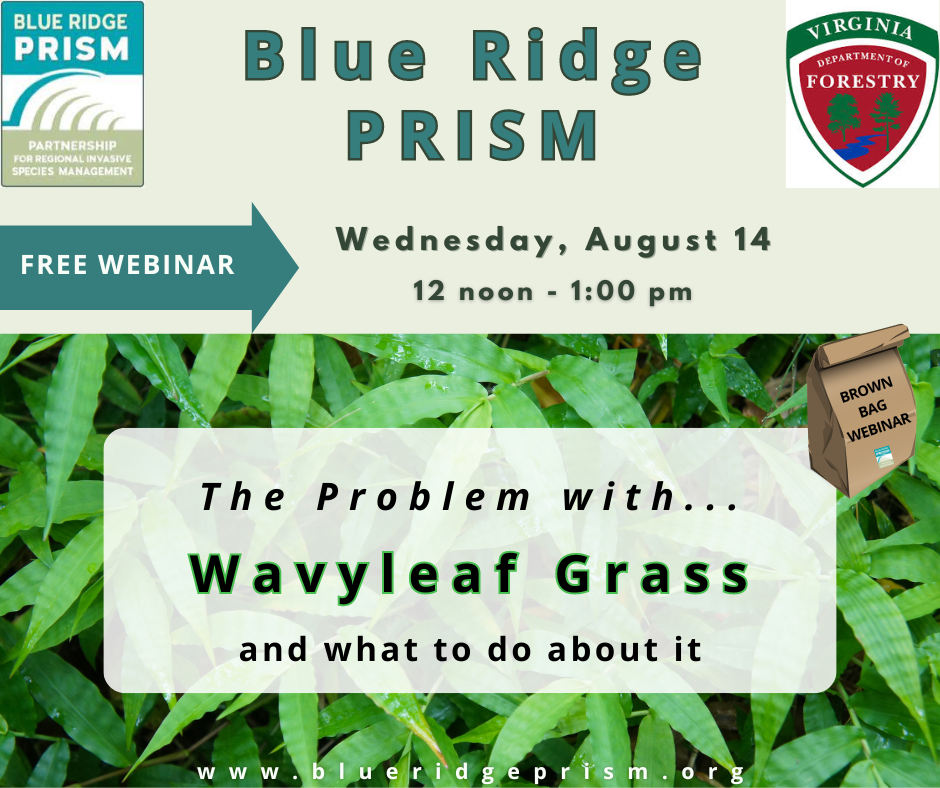
Register for this free lunchtime webinar: https://www.eventbrite.com/e/917481420627?aff=oddtdtcreator
Wavyleaf grass (Oplismenus undulatifolius) is a growing invasive grass problem in Virginia and surrounding states. In fact, ecologists believe that wavyleaf could become even more widespread and damaging than Japanese stiltgrass! Join us during your lunch hour as we describe the background on the species, how it got here, how to identify it, management options, and what work is currently being done statewide to slow the spread of this problematic plant.
Presentation will be given by Lindsay Caplan from the Virginia Department of Forestry with a Q&A with Blue Ridge PRISM experts.
This is a free online webinar. Those who register will receive a copy of the recording.
August in the Ornamental Garden
Pay attention to the basic needs of the garden
- Deadhead annuals and perennials such as zinnias, cosmos, garden phlox, or salvia to improve the appearance of plants and encourage them to continue blooming. For Echinacea, Gaillardia, and other seed-bearing plants, stop deadheading at this point so that birds can eat the seeds this winter. Also, keep in mind that some dried flower heads on plants such as tall sedum, globe thistle, astilbe, and coneflower can look attractive throughout fall and winter.
- Stake or cage perennials that flop over due to heavy seedheads, weak stems, late summer storms, or other reasons.
- Cut back dried flower stalks all the way to the crown of the plant and remove any browned or yellowed foliage or tattered leaves (think hostas) that have been damaged by deer, rabbits or slugs.
- Cut back and fertilize overgrown, leggy annuals in beds, containers, and hanging baskets to produce another flush of growth before the plants succumb to frost this fall. Do not fertilize perennials, trees, or shrubs at this time of year. Late summer fertilizing produces tender new growth that will probably be damaged by cold weather.
- Monitor moisture levels and provide supplemental water to plants as needed. In general, 1” of water applied at the soil level per week is sufficient.
- Do not prune shrubs or trees this late in the growing season. Pruning now will stimulate new growth which may not have time to harden off before winter sets in. So, unless you’re removing a damaged or diseased limb or stem, hold off on pruning until late winter or early spring when the plant is dormant.
Don’t let the weeds get out of control
While all our ornamental plants are gasping for water and respite from the heat, weeds perversely thrive under such stressful conditions. Every weed that produces seed this year means more weeds and more work for you next year. Some particularly prolific weeds include the following:
- Common Ragweed (Ambrosia artemisiifolia). This broad-leaf summer annual is the source of pollen that causes late-season allergies for many of us. Ragweed produces an amazing quantity of seeds in late August through September. One mature plant can bear between 30,000 and 62,000 seeds. Should any of the seeds become buried in the soil, they can remain viable for decades. See Virginia Tech’s Weed ID website for photos and additional information on Common Ragweed.
-

Spiny amaranth. Photo: John D. Byrd, Mississippi State University, Bugwood.org
Spiny Amaranth or Spiny Pigweed (Amaranthus spinosus). This summer annual is capable of producing about 235,000 seeds per mature plant. See the Purdue University Extension’s fact sheet for description and control of Spiny Amaranth. Obviously prolific, this weed also has a taproot, which is difficult to pull when the soil is dry. Wearing gloves when pulling this weed is highly recommended due to the quarter-inch long spines at the base of the leaves.
- Common Beggarticks (Bidens frondosa). This weed sports small, golden-yellow blossoms in late summer through early fall followed by seeds that have two tiny barbs designed to latch onto animal fur and clothing. If you spot this weed in your garden, be sure to remove it before the seeds mature. Otherwise, you may never get rid of it. See the University of Missouri Weed ID website for several good photos of Common Beggarticks.
Stay alert for plant pests and diseases
Just as weeds appear to thrive in sweltering heat, insect pests and diseases don’t seem to be impeded by it either. Stay on the alert for such problems as:
-

Hollyhock rust. Photo: Penn State Dept. of Plant Pathology & Environmental Microbiology Archives, Penn State University. Bugwood.org
Rust – This fungal disease occurs when relative humidity is high and moisture stands on leaf surfaces for extended periods of time. Rust fungi produce masses of yellow, orange, brown, or rust-colored spores as part of their life cycle. Like powdery mildew, rust is an unsightly disease, but it rarely kills a plant outright. It will, however, stunt the plant and reduce its vigor. Rust is particularly common on ornamental plants such as asters, daylilies, dianthus, irises, hollyhocks, and phlox. For mild infections, remove infected leaves to contain the disease. The University of Massachusetts publication on Rust Diseases of Ornamental Crops is a good source for information on controlling this disease.
- Black spot – As its name suggests, this fungus appears as round black spots on the upper sides of rose foliage. The spots are often surrounded by yellow halos. As the disease progresses, the leaves turn yellow and fall from the plant. If you leave the leaves where they fall on the soil or mulch, the fungal spores will overwinter and infect next year’s roses. To contain black spot, remove all fallen rose foliage and dispose of it in the trash. Do not put it in your compost pile. The Missouri Botanical Garden website provides a detailed explanation of black spot of rose and recommends several integrated pest management strategies for containing it.
- Fall Webworms – A widely distributed native pest of shade trees and shrubs, fall webworms appear in mid- to late summer through early fall. They skeletonize and consume leaves inside the protection of a tent-like silken web, which they spin over the foliage they are consuming. See Virginia Cooperative Extension Publication 2808-1013, Fall Webworm, for additional information on the life cycle of this pest and methods for its control.
- Spider Mites — These tiny pests can inflict serious damage to flowers, shrubs and both evergreen and deciduous trees during hot, dry weather. According to the Virginia Tech publication on spider mites, they use their needle-like mouthparts to pierce the leaves of host plants and suck out the fluids from individual plant cells. This results in a stippled or flecked appearance on leaves. It may be too late to eradicate spider mites this year but note their symptoms so that you can use safe and effective controls in the future.
- Scale Insects – Many species of armored (hard) and soft-bodied scale species are difficult to detect unless you know what to look for. These immobile insects use their piercing-sucking mouthparts to extract fluid, causing loss of vigor, yellowing of foliage, and branch dieback to a range of trees, shrubs, and other ornamental plants. At the newly hatched or juvenile stage, scale insects are called crawlers. Depending on the species, more than one generation may be born per growing season resulting in crawlers during May and June and then again in August and September. Ladybugs, lacewings, and parasitic wasps are natural predators of scale insects. At the crawler stage, scale insects are also vulnerable to insecticides. VCE Publication 2808-1012, Scale Insects, provides additional information.
For more information on a variety of plant pest and disease treatments, see the Virginia Tech Home Grounds and Animals Pest Management Guide 2023.
Evaluate your perennials and annuals for heat and drought tolerance
Using plants that are naturally heat and drought tolerant help keep the late summer garden looking fresh and inviting. The following characteristics generally indicate good drought tolerance in plants:
- Gray or silver-hued foliage — The silvery color helps cool the plant and reduce water loss through transpiration.
- Fuzzy or woolly-looking foliage – The leaves of many gray or silver-leaved plants may also be covered with tiny hairs, giving the plant a fuzzy, woolly, or hairy look. The hairs reflect solar radiation, which helps to cool the leaf surface. In addition to slowing evaporation, they also capture moisture on the leaf surface and help offset the effects of drying winds.
-
Small Leaves – Many drought-tolerant plants have fine or lace-like foliage. The smaller leaf surface area offsets the loss of water through the leaves.

Threadleaf coreopsis has many tiny leaves. Photo courtesy of Missouri Botanical Garden Plantfinder
- Thick, fleshy leaves – The cells within the thick, fleshy leaves of some plants, particularly succulents, evolved to store water as a survival strategy during periods of sparse or no rainfall. Many of these plants are also able to store water in their stems and roots.
- Waxy-coated leaves – All plants have a thin waxy coating called a cuticle on their leaves, but those plants that have evolved with a thicker waxy coating are better equipped to retain water by limiting transpiration.
- Taproots – Plants with long taproots rather than fibrous roots are able to penetrate well below the surface of the soil in search of water.
Another important strategy is to use plant species that are native to Central Virginia. These species have evolved using a variety of strategies for coping with the environmental conditions specific to this geographical area. Check out this list of Native Drought-Resistant Plants for the Charlottesville area.
Watch for signs of drought stress in woody ornamental plants
Lack of water affects plants in various ways, depending on the species of plant and the level of stress to which they are subjected. In addition to wilting, which is frequently the first sign of drought stress, look for the following signs:
- Premature fall color on trees – This indicates that the leaves have stopped producing chlorophyll and is a signal that the tree may be in trouble. Drought stress may be the problem but not necessarily. Repeated defoliation by Japanese beetles or other insects, for example, can stress a tree. Also, the problem could be caused by damage from weed eaters and lawn mowers or from lack of oxygen at the root level if the tree was planted too deeply. Some detective work may be required to properly diagnose the problem.
- Leaf Scorch – This condition appears as a browning of leaf margins and tips. It is commonly observed on deciduous trees, such as maples, oaks, lindens, horse chestnuts, dogwoods and Japanese maples, and on broad-leaved evergreen plants such as magnolias, rhododendrons, hollies, and Japanese Andromeda (Pieris japonica). Leaf scorch may be the result of a combination of factors, including high temperatures, drying winds, and low soil moisture.
- Shedding of leaves – In an effort to conserve water, some trees sacrifice their older leaves in order to divert moisture to new growth and buds.
- Shoot dieback – Drought may make some woody plants (trees and shrubs) more susceptible to canker diseases. These are localized fungal infections that can cause the dieback of twigs and branches. Typically, a canker appears on a tree branch or twig as a sunken, slightly discolored lesion. Prune the twig or branch several inches behind the lesion. Do not cut into the lesion. Otherwise, you may renew or spread the fungal activity. Sterilize pruners after each cut using rubbing alcohol or a 10% bleach solution.
A drought this year may affect the health and vigor of next year’s plants. Water-stressed shrubs that are forming flower buds for next year’s display may produce fewer buds and smaller leaves. Fruiting shrubs, such as winterberries, may drop their berries.
Also, pay attention to evergreen species. Although water stressed, they often do not provide any clues to their condition and may stay green until it’s too late.
Be alert to invasive species
Japanese stiltgrass (Microstegium vimineum) is an annual invasive that germinates a couple of weeks before crabgrass and flowers beginning in July into October. A single mature plant can produce about 1,000 seeds. The seeds ripen and drop to the ground between August and December and can remain viable in the soil for up to 7 years. Mowing and weed whacking it in August greatly reduces seed formation. For more information on this invasive species and how to control it, see the Blue Ridge Partnership for Regional Invasive Species Management (PRISM) fact sheet on Japanese Stiltgrass and the Invasive Plant Control Calendar in the May 2022 issue of The Garden Shed.
Plan ahead
Fall is the best time to divide spring or early summer-blooming plants. Make a list now of perennials to move or divide this fall and decide where to plant the new divisions. A little planning now will save you lots of time later when you get ready to perform this task. Plan to finish dividing plants about 6 to 8 weeks before the first hard freeze so that the roots have plenty of time to recover before the onset of winter weather.
In addition to perennials, anticipate planting trees and shrubs later this month or in early fall so that they have time to settle in before winter. Prepare the hole in advance so that the plant can be transferred from its container and into its permanent home as quickly as possible. Water immediately and monitor closely while the plant is getting established. Plan on watering until the soil freezes this winter.
Sow seeds in late summer for cool-weather annuals such as calendulas, Iceland poppies, primrose, pansies, violas, snapdragons, stock, or forget-me-nots. Next spring, you’ll be glad you planned ahead and sowed the seeds now.
Order spring-flowering bulbs now while selections are good. If you’re buying bulbs directly from garden centers or nurseries, choose the largest bulbs available. Be wary of so-called “bargain” bulbs. If the bulbs are small or of inferior quality, they may not be much of a bargain.
Featured Photo: Rudbeckia ‘American Gold Rush’ by Pat Chadwick
Weed Management
What is a weed and what harm do weeds do?
For the gardener’s purposes, a weed is frequently defined as “a plant out of place” or “a plant whose virtues have not yet been discovered,” to quote Ralph Waldo Emerson.
Admittedly, some weedy plants are edible or provide shelter for wildlife. Some are beneficial as sources of pollen and nectar. So, why can’t we just “live and let live?”
Weeds are considered “bullies” because they tend to grow fast and compete with desirable plants for light, nutrients, water, and space. They can impede airflow, creating a favorable environment for plant diseases. Weeds can also provide habitat for insect and disease pests that can spread to desirable plants and may even pose a health hazard to humans (e.g., poison ivy, ragweed). A vegetable garden full of weeds will produce fewer vegetables. Weeds also reduce the aesthetics and functionality of our landscaped areas.
In our changing climate, many invasive weeds have a greater ability to adapt to higher temperatures and emerge earlier in the spring, flower earlier, and outcompete many slower growing native plants that provide food and shelter for our birds and pollinators. This article does not address the invasive weed problem other than to say that climate-friendly gardening practices make a difference. Read more on combatting invasive plants here. Do NOT introduce any non-native ornamental plants that we know to be invasive but are still being sold at garden centers.
How do weeds get into your gardens?
Most certainly, all soils in Virginia contain weed seeds, and weeds will always be a part of your garden ecosystem. Weeds are spread by many sources, including the wind, water, bird deposits, and last year’s crops and weeds. Seeds can be brought to your yard in a load of compost or in potting soil of transplants, or they can be stuck to the sole of a shoe or the hoof of an animal. They can also come in from adjacent lawns, fields, or woods. Underground stems of creeping grasses or Canada thistle can travel as much as a foot through the soil before emerging in your garden. Believe it or not, every square inch of your garden soil contains weed seeds, but only those in the top inch or two will get enough light to germinate.
Identify your weeds.
Learning to recognize problem weeds before they are established makes it easier to keep them from overtaking your garden. There are several ways to identify your weeds.
- Use a dichotomous key, a tool that relies on a step-by-step comparison of vegetative characteristics to identify a plant.When you see a weedy plant you cannot identify, dig it out, including the roots, and lay it on a paper towel. Then turn to the dichotomous key in a practical guide such as Weeds of the Northeast, which covers a region from Virginia to southeastern Canada. Do the leaves come out of the base of the plant or on the stem? Are the leaves opposite each other or alternating on the stem? Is the leaf simple or compound, having several leaflets? Are the roots short and numerous or long and running? Is there a long taproot? Look at the flower or fruit structure. The species descriptions in this guide provide a lot of information and photos of the plant at the various stages of growth.
- Use a mobile plant ID app, such as PictureThis. To get the best possible results, take multiple pictures of the same plant from different angles and distances, and make sure results are consistent. Don’t use those results to make a positive ID immediately but as a starting place to confirm that ID through other sources. Also, make sure you are using a plant ID app rated highly for reliability and accuracy. Click HERE to see Michigan State University Extension’s recent evaluation of some popular plant ID apps.
- Consult Virginia Cooperative Extension. Send a photo via email to the Albemarle VCE Helpdesk at albemarlevcehelpdesk@gmail.com, or bring a sample to our Helpdesk at 460 Stagecoach Road, Charlottesville. Or, submit a photo or a sample directly to the Virginia Tech Weed ID clinic.
Understand weed biology.
When you identify a weedy plant, learn about its growth habit. The lifecycle of weeds falls into three categories: annual, biennial (seed), or perennial (root and seeds). Knowing the difference can help you determine the most effective method for managing a weed problem.
Annual weeds grow predominantly by seed and complete their life cycle (seed germination to seed dispersal) in one year or less. Annuals are categorized into two basic groups:
- Winter annuals germinate from seeds in late summer-early fall, survive the winter, regrow, flower and set seed in the spring, and die when summer heat arrives. They can also germinate in the spring but die in the summer. Examples: henbit, chickweed.
- Summer annuals germinate from seeds in the spring, grow in the summer, and die in the fall. Examples: Japanese stiltgrass, crabgrass.
Biennials require two growing seasons to produce seed and complete their life cycle.
Perennials live for two or more years. They reproduce not only by seed but also by spreading vegetatively through roots, rhizomes, stolons, or tubers. They can be herbaceous (without a woody stem) or woody. Typically, they die back in the fall and send up new growth in the spring. These are the most difficult weeds to control, since they will regenerate from any parts left alive in the soil. They are much harder to pull, and when they do come out, the root often breaks, leaving pieces in the soil that will often propagate again. Cutting these weeds at the soil level repeatedly will eventually deplete food reserves and kill the plant.
Practices and strategies for weed management
Prevention is the most important strategy. Keep in mind that weed seeds germinate in open and disturbed soils.
Leave no surface bare. Nature abhors a vacuum. Close spacing of garden plants can reduce weed growth by shading the ground, thus limiting seed germination and allowing your plants to outcompete undesirables. Eventually, tight planting will eliminate the need for repeat mulching.
In the vegetable garden, shade the weeds by:
- using organic mulch, such as straw or leaves, at the time of planting,
- interplanting with cover crops such as buckwheat after vegetables are established,
- planting crops intensively so that leaves of one plant will barely touch the next plant, thus covering and shading the bed when plants mature.
Minimize soil disturbance. Tilling or overworking the soil can increase weed problems by exposing seeds to light or by cutting and spreading pieces of perennial weeds that can regrow.
- When planting, minimize the size of hole you dig to limit soil disturbance, and then apply the appropriate mulch for your bed. (Vegetable gardens have different mulching needs from perennial beds).
- Remove young weeds by hand, or use shallow cultivation with superficial hoeing with a stirrup or loop hoe, which will cut weeds off at or just below the soil line with minimal soil disturbance. Remember, even the act of pulling a weed creates a soil disturbance and can encourage weed seed germination.
- Use the right tool (e.g., dandelion or hori hori knife) to dig up roots and underground parts of perennial weeds without overly disturbing the soil. (For best results, dig when plant is young and soil has some moisture but is not overly saturated.)
- Cut the weed at the soil level repeatedly (on a weekly schedule) until the leaves cannot provide enough food to sustain the plant.

Limit seed germination and seed dispersal, whether the plant is an annual, biennial, or perennial weed. There is an old proverb that says, “one year’s seeding, seven years weeding.” Soils have a seed bank of viable seeds that have accumulated in the soil over time. Some weed seeds can stay dormant in the ground for many years and germinate when they receive the right environmental conditions (light, temperature, moisture, scarification) to grow. Preventing weeds from producing seeds will result in fewer seeds in the soil in the following years. The rule of weeding is: if you see a weed in bloom, pull it immediately before it sets seeds!
Keep the creeping, perennial weeds with strong, extensive root systems and weed seeds out of your compost pile.
What about herbicides?
In general, in an integrated weed management program, herbicides should be used only as a last resort for those special, difficult-to-control weed problems. Because of the variety of plants and situations in the home landscape, it is impossible to find one herbicide suitable to manage all weeds in all situations. Always read the product labels carefully, and follow instructions on proper use, storage, and disposal.
Do weed patrol weekly during the growing season and be persistent! Young weeds are easier to kill than established ones. Happy weeding!
References and further reading:
Combating Invasive Plants, Piedmont Master Gardeners
Keep It Covered: The Best Organic Mulches for Your Vegetable Garden, Piedmont Master Gardeners
4thesoil, Four Core Principle
Weeds, NC State Extension
Weed ID Clinic, Virginia Tech
Weed Identification, University of Maryland Extension
Weeds in the Home Vegetable Garden, VCE PUB 426-364
Manage Weeds on Your Farm, Ch 4. Mechanical and Other Physical Weed Management, SARE
Featured image: William Clifford, CC BY 2.0 (cropped)